
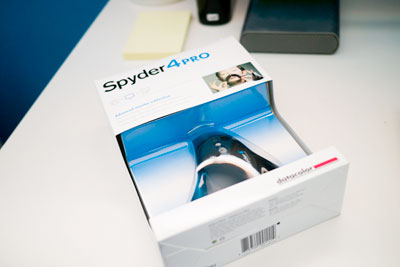
Alghunaim Photo contacted me last week asking me if I’d be interested in reviewing the Spyder4Pro monitor color calibration tool. Since I’ve always wanted to try one of those tools I passed by and picked it up and then spent the weekend playing around with it.
Every monitor displays colors differently and my 27″ iMac never really felt very accurate when compared to other screens around the house. Even though there is an option built into the Mac system to calibrate the color, it involves a lot of eye squinting and results in a final calibration that I don’t trust. The Spyder takes away all the decision making from me, kinda like a little robot with a focus on keeping the colors on my screen calibrated.

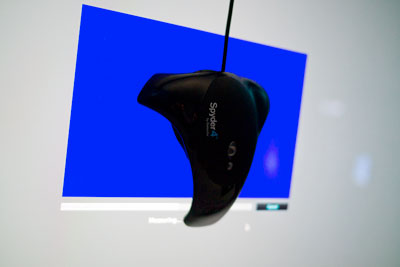
First thing you need to do is install the Spyder software and connect the Sypder to a free USB port on your computer. When you run the software the first test it performs is to measure the ambient light in your room using the light sensor on the Spyder. Once it’s done measuring the light the software then asks you to hang the Spyder on top of the illustrated Spyder on the screen. The Spyder software then proceeds to perform a bunch of tests displaying various colors on the screen while the Spyder measures the results. After a few minutes the test is completed and you’re given an option to either save the new settings or go back to your previous one. You can also compare the new settings with the old one and they even provide you with a variety of pictures to use for comparison.
The best way to perform the before and after comparison is turn away from the screen while changing from one setting to the other. By flipping between the before and after I realized that before the Syder calibration my iMac screen colors were a very cool tone (cool = more towards the blue). After the calibration the colors are more balanced and even the screen brightness which was absurdly bright before is in a much more natural state after the calibration.
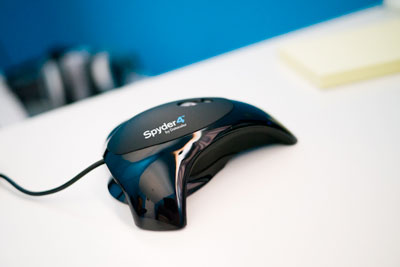
All is not good though since I do have a few quibbles here and there but they’re mostly the fault of Datacolor the company and not the Spyder product. My biggest issue is with the documentation or should I say lack of it. The manual doesn’t really tell you about any of the features of the Spyer and it’s also out dated. According to the manual the way to hang the Spyder onto the screen during the tests is with the help of the supplied rubber bands. But the model I got didn’t have any rubber bands and used a simpler newer method using a movable counter weight on the cable. Because of the lack of documentation there’s one feature that’s still confusing me. When connected to your computer the Spyder continuously measures the ambient room light and informs you with a a red icon if the light is different from when calibrated. What’s confusing me is what to do when the ambient light doesn’t match the one the test was performed with? Do I calibrate the display with different ambient light? Do I perform a test during the day and a test during the night? Do I switch between the different color settings myself? I have no idea what to do and the Datacolor website doesn’t even have the latest manuals uploaded yet alone answers to my questions. If you actually do end up purchasing the Spyder I would actually recommend you visit the product page on Amazon where one reviewer has a step by step guide on how to set everything up. That’s how poor the product’s documentation is.
But, even with the poor documentation I’ve still decided I’m going to purchase the Spyder4pro. The thing is it works and it works really well. Within just a few minutes after setting up to your computer you’ll start seeing results and the difference in some cases can be dramatic. It’s really something every serious photographer should have and also anyone doing any sort of design work. I highly recommend it.
Usually at the end of a review I’d proceed to place links to Amazon but in this case Alghunaim actually sells the Syper for prices slightly less than Amazon. He has three models in the store priced as following:
Spyder4expree KD38
Spyder4pro KD45
Spyder4elite KD65
The three Spyders are similar but each offers additional features than the other model. To see which one is suitable for you check out the chart [Here]
I’m going with the Spyder4Pro because it has the ambient light sensor which is missing from the Spyder4express and I also don’t really need any of the extra features from the Spyder4elite.
Alghunaim Photo is located in Baitak Tower in Kuwait City. Here my my previous post about them [Link]
14 replies on “Datacolor Spyder4Pro Review”
never knew such tool existed!! very confusing
Been using the Spyder 3 Express for quiet some time. Will Check out the Spyder 4 Pro – but for my current needs, I think I am just fine with what I have.
Love the prices of Alghunaim.
lol i didnt know that was a utility to do that !? i use this as my monitor >>> https://accessories.us.dell.com/sna/productdetail.aspx?c=us&l=en&s=dhs&cs=19&sku=224-9949&~ck=baynoteSearch&baynote_bnrank=2&baynote_irrank=0
i just LOVE it @_@ it was a worth while investment.
i have been meaning to buy calibrator for a while now but i’m totally confused after reading this post in the sense of how to use it. I love Alghunaim’s prices, so glad such a shop came along in Kuwait!
It’s easy. You put the calibrator on the screen on top of this picture that pops up https://248am.com/images/spyder4.jpg
and then you wait 5 minutes while it performs the test and then its done. thats it.
im not a photographer but it does look sweet,,, take some pix and show us what it does
i did take pics, check the post above
I’m going with the Syper4Pro* TYPO 😛
thanks 🙂
I meant pix not showcasing the product like a tree or somethin:)
I have a question about the ambient light measurement that it takes first. Now in my room I have both cold and warm CFLs that I use at different times of the day, so will this ambient color temperature affect the calibration or is it just the amount of light that its measuring?
i dont think the color of the light matters more the amount of light because what i understood is that the ambient light effects the gamma calibration and not the color calibration.
Oh I see, thanks.
This is not for the average or casual computer user, that’s why many of you didn’t know it exists or didn’t get the purpose of having it, specially apple users. This is mainly for professional photographers looking for 100% color accuracy. Mark, I have been using HUEY for a very long time, I have a basic one, not the fancy expensive new products and I find that it does the job just fine. Color correcting your mac could be very challenging.